Max Canning
Unit 1 FMP
Action Research:
Cinematography research:
Requirements:
GoPro
Chest strap
Football
I will be researching action shots of POV football play with a GoPro attached to my chest and head testing how the camera picks up eye-tracking shots to give the audience a direct feeling of playing football.

Setting up the GoPro took a while and Eric and I didn't understand how to turn it on and film properly but we tried and filmed our test shots. However this turned out to be a big failure as we pressed the wrong buttons and didn't manage to film anything, this forced us to go back and do it all again, a learning curve to say the least.

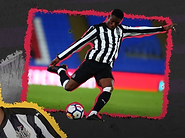
This part was the testing section, I kicked the ball around and juggled it to test how it would look on the GoPro and what quality of action it captured and presented. This part was easy as I enjoy playing football despite my back injury.

Again, I juggled the ball and kicked it around replicating real-match moves to see how it would look in person and when I wear one in a game.
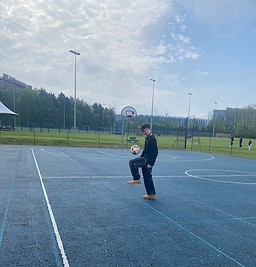
More juggling and knee shots to see how the GoPro adjusted to different heights of control and shooting. This is something I needed to know to ensure that a GoPro was the best choice for my action shots of B-roll

This is an example of me testing even higher heights to see if the GoPro would follow and capture my eye level.
Strengths:
This style of filming proved to be an exciting and unique way to film action in the height of its rush. The footage captured a POV shot of what it's like to play football and experience what is being talked about. These are sparkling qualities for a sports documentary as it allows me to re-create what is being documented for some exhilarating and captivating B-roll.
Weaknesses:
However, this piece of filming equipment had its limitations. One of which was the quality of film I found when I reviewed the footage, it wasn't of the quality I expected or need for my documentary. It was also a complicated device which I am sure I'll get used to but it cause some problems for even just the testing. The GoPro is also difficult to attach to my body without it interfering with my game. Either a chest or a head strap will prevent me from taking chest touches and the head strap will prevent me from heading the ball.
Problems:
As soon as me and my team mate got out to the court to film, we faced some problems with the device and how it worked. We thought we had figured it out but when we went to review the footage we noticed that it was taking photos not videos. However, we overcame and solved this by asking the teacher for a step-by-step of how it works and how to get it to film properly. After this, we went back out to the court and filmed again ensuring that we were recording when doing so, this proved to come out with some good videos. The quality of video was lower than we expected but it was only a setting that can easily be adjusted.

Conclusion:
In conclusion, after this action research, I have decided to use the GoPro for my documentary. The only real problems I faced can be adjusted when looked at properly, and the minor problems can be dodged. For instance, the chest and head problem can be avoided by not filming in real matches, just B-roll of training or practise. In addition, it can also only be worn in a real match for a short period of time or by a goalie that does not need his head or chest.
How this will benefit my documentary:
This will benefit my documentary by implementing extra elements of action and exhilaration that any good piece of sport cinematography has. Not only this, but it will also elevate the intimacy of the words of my interviewees telling their stories and it will help my audience to visualize what's being said and represent all the emotions being discussed. GoPro's also display POV footage that can evoke the skill one wearing it has and the precision they play the game with.
Interview audio research:
Requirements:
Lapel mic
Boom mic
Boom stick
The quality of audio is essential for my documentary as it is full of voice-over. This research will decipher which microphone is the best for interviews so I can clearly and concisely use the audio to link and travel over my B-roll.
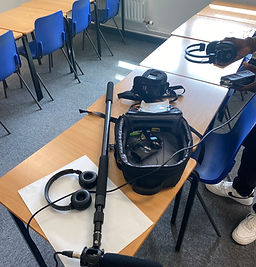
Setting up this audio was quick and simple. The boom mic had to be connected to a zoom pack with the audio turned up to capture our voices. We also tested a lapel mic which again was easy and only included the record button alongside the mic being connected.

This is the actual testing phase of the boom mic, Eric spoke into it and recorded it whilst I held it over him to capture his voice. We also did this with Fleur and me, alternating roles to ensure we all understood how it works and what it is supposed to sound like.
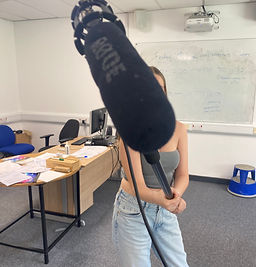_jfif.jpg)
This is Fleur holding the mic towards my voice to capture what I was saying. This constant holding of the boom mic is a reason as to why I may have to choose an alternative for my documentary.
Strengths:
The boom mic had its strengths such as the high quality of clear audio it captured, and the simplicity of its set up. The lapel mic was again quick and easy to set up and recorded some decent audio when attached to the collar of the speaker. The lapel mic is also small and can be worn with minimal visibility which is important.
Weaknesses:
Whilst there were strengths with both the mics we tested, there were also weaknesses I found whilst testing. The boom mic for instance, is too heavy and would require someone (most likely me) to hold it head-height for the entire interview. This is also because the range of the boom mic is shorter than I would like for my interviews. In addition, the lapel mic also lacks range and the quality is not as good as the boom mic.
Problems:
My team and I didn't run into any significant problems when testing the equipment as it was relatively straight forward to set up. However, we did struggle to figure out how to attach the head of the boom mic to the actual stick in order to hold it from a far above the head of the speaker. Using the zoom device to record the audio was a problem as it didn't record to start with and we didn't have headphones to hear how it sounded but we overcame these problems quickly.
Conclusion:
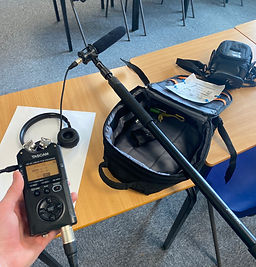
In conclusion, I have decided that the boom mic, despite its high quality audio, is too heavy and would require too much energy to record the audio for my interviews. Instead, after testing, I have decided to use the lapel mics for my interview as they are easily attachable, they pick up decent, clear audio with a good range when sitting on the collar of my interviewees, and they are perfect for interviews.
How this will benefit my documentary:
This choice of a lapel mic is perfect for my documentary and the benefits of this action research have made it easy for me to choose. The lapel mic will pick up good quality audio for me to play over the top of B-roll and to capture the change of tone and emotion in the voice of my interviewees. It is also small and easily ignored when shots of the interview are being displayed. So as a whole, this is the perfect choice of audio for my style of documentary.
Three point lighting research:
Requirements:
Bed Sheet/ Any white sheet
Big (key) light
Over-head light
Background light
Subject
Three point lighting will help to boost the quality of my interviews and evoke the mood shifts in the atmosphere when I ask certain questions.
_jfif.jpg)
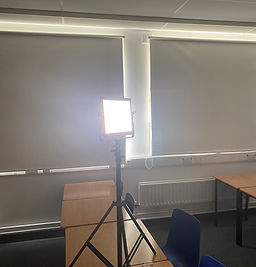
When testing this lighting equipment, I adjusted the warmth and the brightness, testing how it would look on an interviewee. I also adjusted the height of the light as you can see, this is the mid-height point. This was definitely the best height to compliment the subject's complexion.

This is a BTS photo of my subject sitting in an interview-test position so I could model how my interviews will look with different lighting. Both different settings like warmth and colour, but also height and direction.

This is a close up of the panels of lighting that I can adjust to display different shades. This photo is the light on medium warmth and full exposure, this was found to be the best and most complimenting light. This could also be used as the only light needed in an interview and is not over-glaring or uncomfortable for my interviewees.
Strengths:
This lighting is highly useful and after some intense testing I can see that it is a good piece of equipment to use because it is a very powerful source of light. The light travels far and maintains its strength of depth even from a far distance to ensure that the subject is not under any discomfort from the strain or glare of the light. In addition, the light has many other qualities like its depth of warmth which helps to enhance the mood of the atmosphere and help effect the emotions of the viewers.
Weaknesses:
I didn't find too many weaknesses with this lighting, it appears to be space-filling, punctual, clear and adjustable. However, it does carry some harsh glare when it is too close to the subject, this can be a problem as if it is too far away, or not facing the subject it may not be as clear as we need to get the perfect interview film.
Problems:
Eric and I found to begin with that we couldn't find an empty classroom, and as the light is so big we couldn't do it in the corridor in the way we wanted to. In addition to this, once we found a classroom, we realised that the light doesn't show and is overpowered by the sun, so we had to close the blinds to see the light make a difference. In regards to setting up and turning on the equipment, we found no problems as it was all fairly straight forward.

Conclusion & benefits:
In conclusion, as a result of testing, I have decided that I will be using this lighting to record my interviews. It is practical, clear and adjustable so I can change the warmth to contrast with the mood of the atmosphere. This is perfect for my interview-style doc as I will be asking intimate and revealing questions, pushing my subject to tell their favourite and most memorable times playing football in their era.
Video transitions research:
Requirements:
Camera
Subject
Hand-held tripod
Video transitions will implement an exciting feel to my doc and display a higher quality of editing and filming to boost the credibility of the cinematography and B-roll
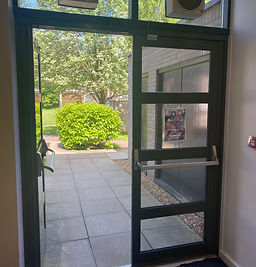
This is the location me and my partner found to do the first transition of many, we used the doors to perform a walk-through transition which proved successful. The wall behind the door is where we tested the wall-swap transition.

This is the first picture of me editing the transitions together. This transition is the into-back location transition, it consists of the cameraman walking the camera into the subject's back and then filming another clip with the camera starting in the subject's back and then gradually moving backwards in a new location to reveal the transition.

This is the second photo of my editing of the back transition. This is the second clip and the second location, as you can see I am in different places but using the same stance which when put together, shows a nice transition of locations.
Strengths:
The strengths of these transitions are simple, it is easy to record and not complicated to edit. It requires only one cameraman and one subject. Also requiring only a camera and a C-grip which are easy to gather and use. In addition, these transitions implement an idea of advanced editing and look aesthetically pleasing when pieced together correctly. Also, it puts a bump into the regular B-roll footage and adds something new that isn't regularly seen in documentaries.
Weaknesses:
The only weakness I have identified with these video transitions is the access to a high-grade C-grip. The video that I researched these transitions for, uses an advanced C-grip that has an auto neck turner to give perfectly smooth transitions and turns from left to right and up to down. This is something that long road tech does not offer and so we are limited to the quality of transitions and smoothness we can produce.
Problems:
My partner and I did not face any problems filming and testing these transitions, however as I stated in the weaknesses section, we did not have access to the best gripping equipment for these transitions. Despite this, the transitions we could do, came out exceptionally.
Conclusion:
In conclusion, I have decided that I will be using these video transitions in my documentary. There weren't many problems, the equipment is not demanding and is easy to set up and also, this will allow me to film footballing action shots with transitions to add some spice.

How this will benefit my documentary:
As I have spoke about previously, this element of advanced editing and filming is something that I cannot ignore and not use in my own piece. This will help to modernize and elevate the quality of my production and give the audience something different to be impressed by. These do not add any more demands to my budget or equipment maximization, and therefore these video transitions are something that will do nothing but benefit and increase the standard of my FMP.
Cinematography research:
Requirements:
Camera
Tripod
Sliding stand
Shoulder mount
This test will specifically research which camera angles are best more my style of interview and how the lighting will sit on the face of my interviewees.

This is a representative photo of me testing how the camera should be set up and how it looks on my subject when I film my interviews. Eric is in place of my subject and this camera angle is slightly off centre and has him looking just to the right of the camera which is an advanced way to film an interview I learnt after watching some research videos.

This is a fascinating piece of equipment that I tested, this is the sliding tripod that sits the camera on top to be pushed from side to side to follow the subject without shakiness or dropping. This is an exceptional piece of equipment to use to follow someone's movements like a walk or a run.
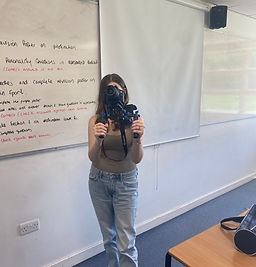
This photo is another of my partners testing the shoulder grip which I tested too. This camera sits on top of the shoulder grip and is a great tool to use when following a subject as it steadies the camera whilst you're moving in all directions and allows you to flick and transition quickly.
Strengths:
The strengths of each piece of camera holding equipment we tested here are easily identified. The sliding tripod is amazing at steadying the camera and maintaining a smooth recording of movement with a simple push. The tripod is a reliable and essential piece of equipment that is perfect for filming interviews and stays still to capture all of the facial expressions and head movements that my subjects will display. As for the shoulder grip, this allows the cameraman to walk around and move freely without having to worry about the quality of video as the camera sits still on the end of their shoulder piece.
Weaknesses:
There are however some weaknesses with each piece of equipment. For instance, the sliding grip does not have much flexibility and isn't long enough to film a run or any long amounts of movement due to its fixation on the top of the slider. As for the shoulder grip, it takes a lot of constant attention and concentration to keep the camera upright, as well as this, it is rather heavy and can be a high demand for the cameraman. Weaknesses of the tripod are similar to the slider, its lack of flexibility and movement will require someone to have to sit rather still as to not go out of frame or focus when recording the interview.
Problems:
My team and I didn't run into many problems when setting up or testing the equipment, however, the sliding tripod was hard to understand at first. This equipment was smooth and didn't take too much time to test thoroughly so as a whole there were next to no problems with this test.
Conclusion:
In conclusion, I have decided that I will be using the tripod for my FMP as it is the most practical of all the equipment I tested and it is the most stable when recording a static interview. In regards to the sliding tripod, I have decided against using it due to its limited flexibility and sheer size, for what it is able to do and the ways it will benefit me, it is not worth taking and being responsible for such large resources. The shoulder grip falls under the same circumstances and despite its flexibility and stability I will not be using it for my documentary.

How this will benefit my documentary:
With my conclusion being that I will only need to use and take the tripod, this will benefit my interviews massively. Without a tripod, filming an interview would be very difficult and wouldn't look like a high quality production. High quality is exactly what I am looking for when filming my FMP as I would like to impress and show my skills especially with my interview filming. The tripod was the first piece of holding equipment that I ever learnt how to use to stabilize a camera and so I feel as though I am very experienced with this piece of equipment and I will use it to its best ability.
Job Roles and Responsibility:
With any piece of film you need assigned roles to push for the best and utilise the entire crew's best assets. However, we were given the choice to complete this FMP solo or partnered, my other projects showing that I work best alone, led me to choose solo. This choice to work alone is in my best interest as I see things clearer and execute them in a way that compliments the raw ideas when I assign myself almost every single role. I am well organised, responsible and thrive under pressure, all qualities that will help me achieve the highest grades on my own. This opportunity to create a documentary about my favourite sport with the disposal of exceptional equipment excites me and pushes me to research all roles that I will take on myself, for the best FMP.
What does a director do?
A director signifies the creative lead and mastermind behind a piece of film. They are recruited by the Producer and have the responsibility of turning the script into an exciting and engaging production, usually assisted and inspired by the screen writers / screen team.
The director also has a lot of say in who gets employed to work alongside them, i.e. the assistant director, production designer or director of photography, in order to best visualise their ideas.
After this process, they begin to help recruit actors they believe can best bring their characters to life, and slot in with the rest of the team, this recruitment is commonly assisted by casting directors.
Alongside this, a director will be instructing other members of the crew such as the wardrobe and make-up supervisors, to ensure their actors deliver the best performance, but also that all technical / visual aspects are in place.

What does a Director of Photography do ?
The DoP is responsible for the photographic heart of a production. Camera movement, style, picture quality, framing and even lighting are all things a DoP has to consider when on set, producing a piece of film.
Their role surrounds how the set looks through the lens, they work closely with the director to depict exactly what they're looking for and how they can best visualize it.
Every single day of filming, the DoPs are expected to arrive early and set up for rehearsals to find new angles and picture depths that compliment the raw ideas to the max.
They work alongside the camera operator, gaffer, and grip to discuss any new ideas or insights into special camera movements or lighting requirements.

What does an Editor do?
The main objective / role of an editor is to piece the film together chronologically and sort the cuts of film to make sense and follow the story.
This is an essential part of the filming process as films are rarely filmed in order, sometimes an editor could be editing pieces of the ending scene before the full opening is even filmed.
During the Pre-production phases, editors work closely with the director looking at rushes, technical standards and ensuring all film will fit with the editing ideas and capabilities.
During Post-production, the editor and director will link up to refine the assembly edit into a director's cut, then reviewed by the producers until they achieve picture lock.

Pre-production planning documents:

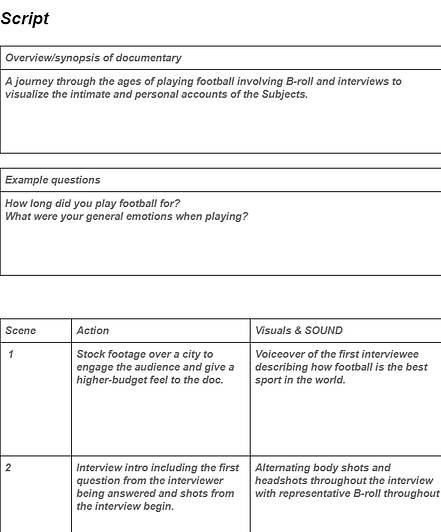


Research into existing products:
Documentaries I have researched are similar to the idea of mine and some of these are extremely gripping and entertaining. This first one is the Leicester City 2015/2016 season win which went down in history, a doc was made about it and interviewed the star players which came together for a thrilling 10 minute film. This level of excitement and engagement is something I would love to run through my FMP. I will replicate the time frame between cuts of B-roll and Interview footage to maintain the pace from start to finish
This second doc I have watched for research is about the brutal release of an academy footballer that took a nasty injury and therefore was never offered a contract. This style is a lot more suited and similar to mine as it only shows two or three clips of raw playing footage which is what I'm working with as well, this one is less B-roll and more actuality footage that helps evoke emotion. I will be using techniques such as slow back shots and head shots whilst also adding playing footage throughout, in certain places.
Another thing to add is how this documentary opens, with stock city footage, slow motion B-roll, emotive music and voiceover of the love of the game.


Audience appeal - This is the same as my documentary... Footballers / football enthusiasts.
Tone - the Leicester doc is more of an uplifting and excitable doc tone which I want to implement in my doc so I will copy similar music.
Effectiveness - Both are very effective yet the second one about a personal harsh experience leaves a mark more. I hope to leave a mark but do it in an uplifting way like the first doc.
Sound design - the music used in the beginning of the second doc is perfect and I will use similar sounds, however the first doc's music throughout is much more suited to my style and what I want to achieve.
interview styles - The style of interview in the first doc is much brighter and more intimate and is what I will be using for mine aswell.

